This article is about using a Kanban planning. If you want more information about what Kanban is and how to set it up in vPlan, please visit: Introduction Kanban and Setting up Kanban
Using Kanban
Kanban is a simple to use status planning with cards and columns. Recognisable for everyone and maximum overview.
1. Enable Kanban view
2. Kanban legend
3. Create and plan cards
4. Moving cards
5. Assigning cards
6. Preferences and filters
7. Using Kanban in combination with planning by date
8. Using Kanban in combination with stage planning
9. Using due date in Kanban
1. Enable Kanban view
If this is your first time using the Kanban view, make sure you enable it at the top of vPlan. This is done with the star icon where you can show or hide plan views:
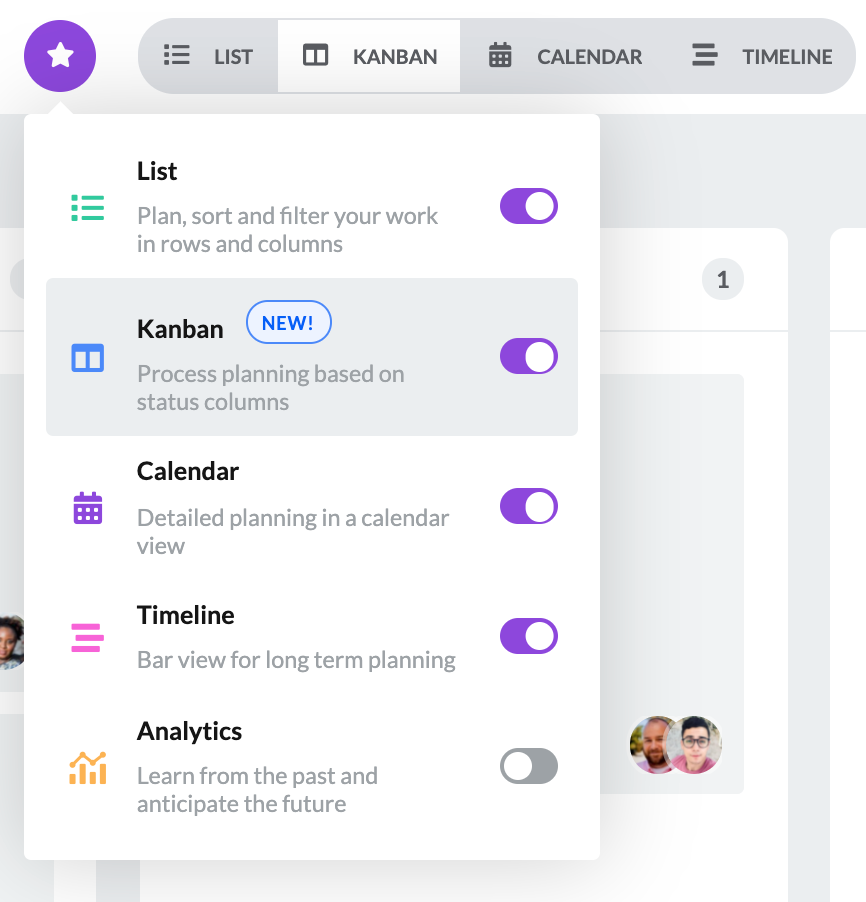
If you have enabled Kanban, the view appears in the top menu bar of vPlan. Click on the ''Kanban'' button to show the plan view.
2. Kanban legend
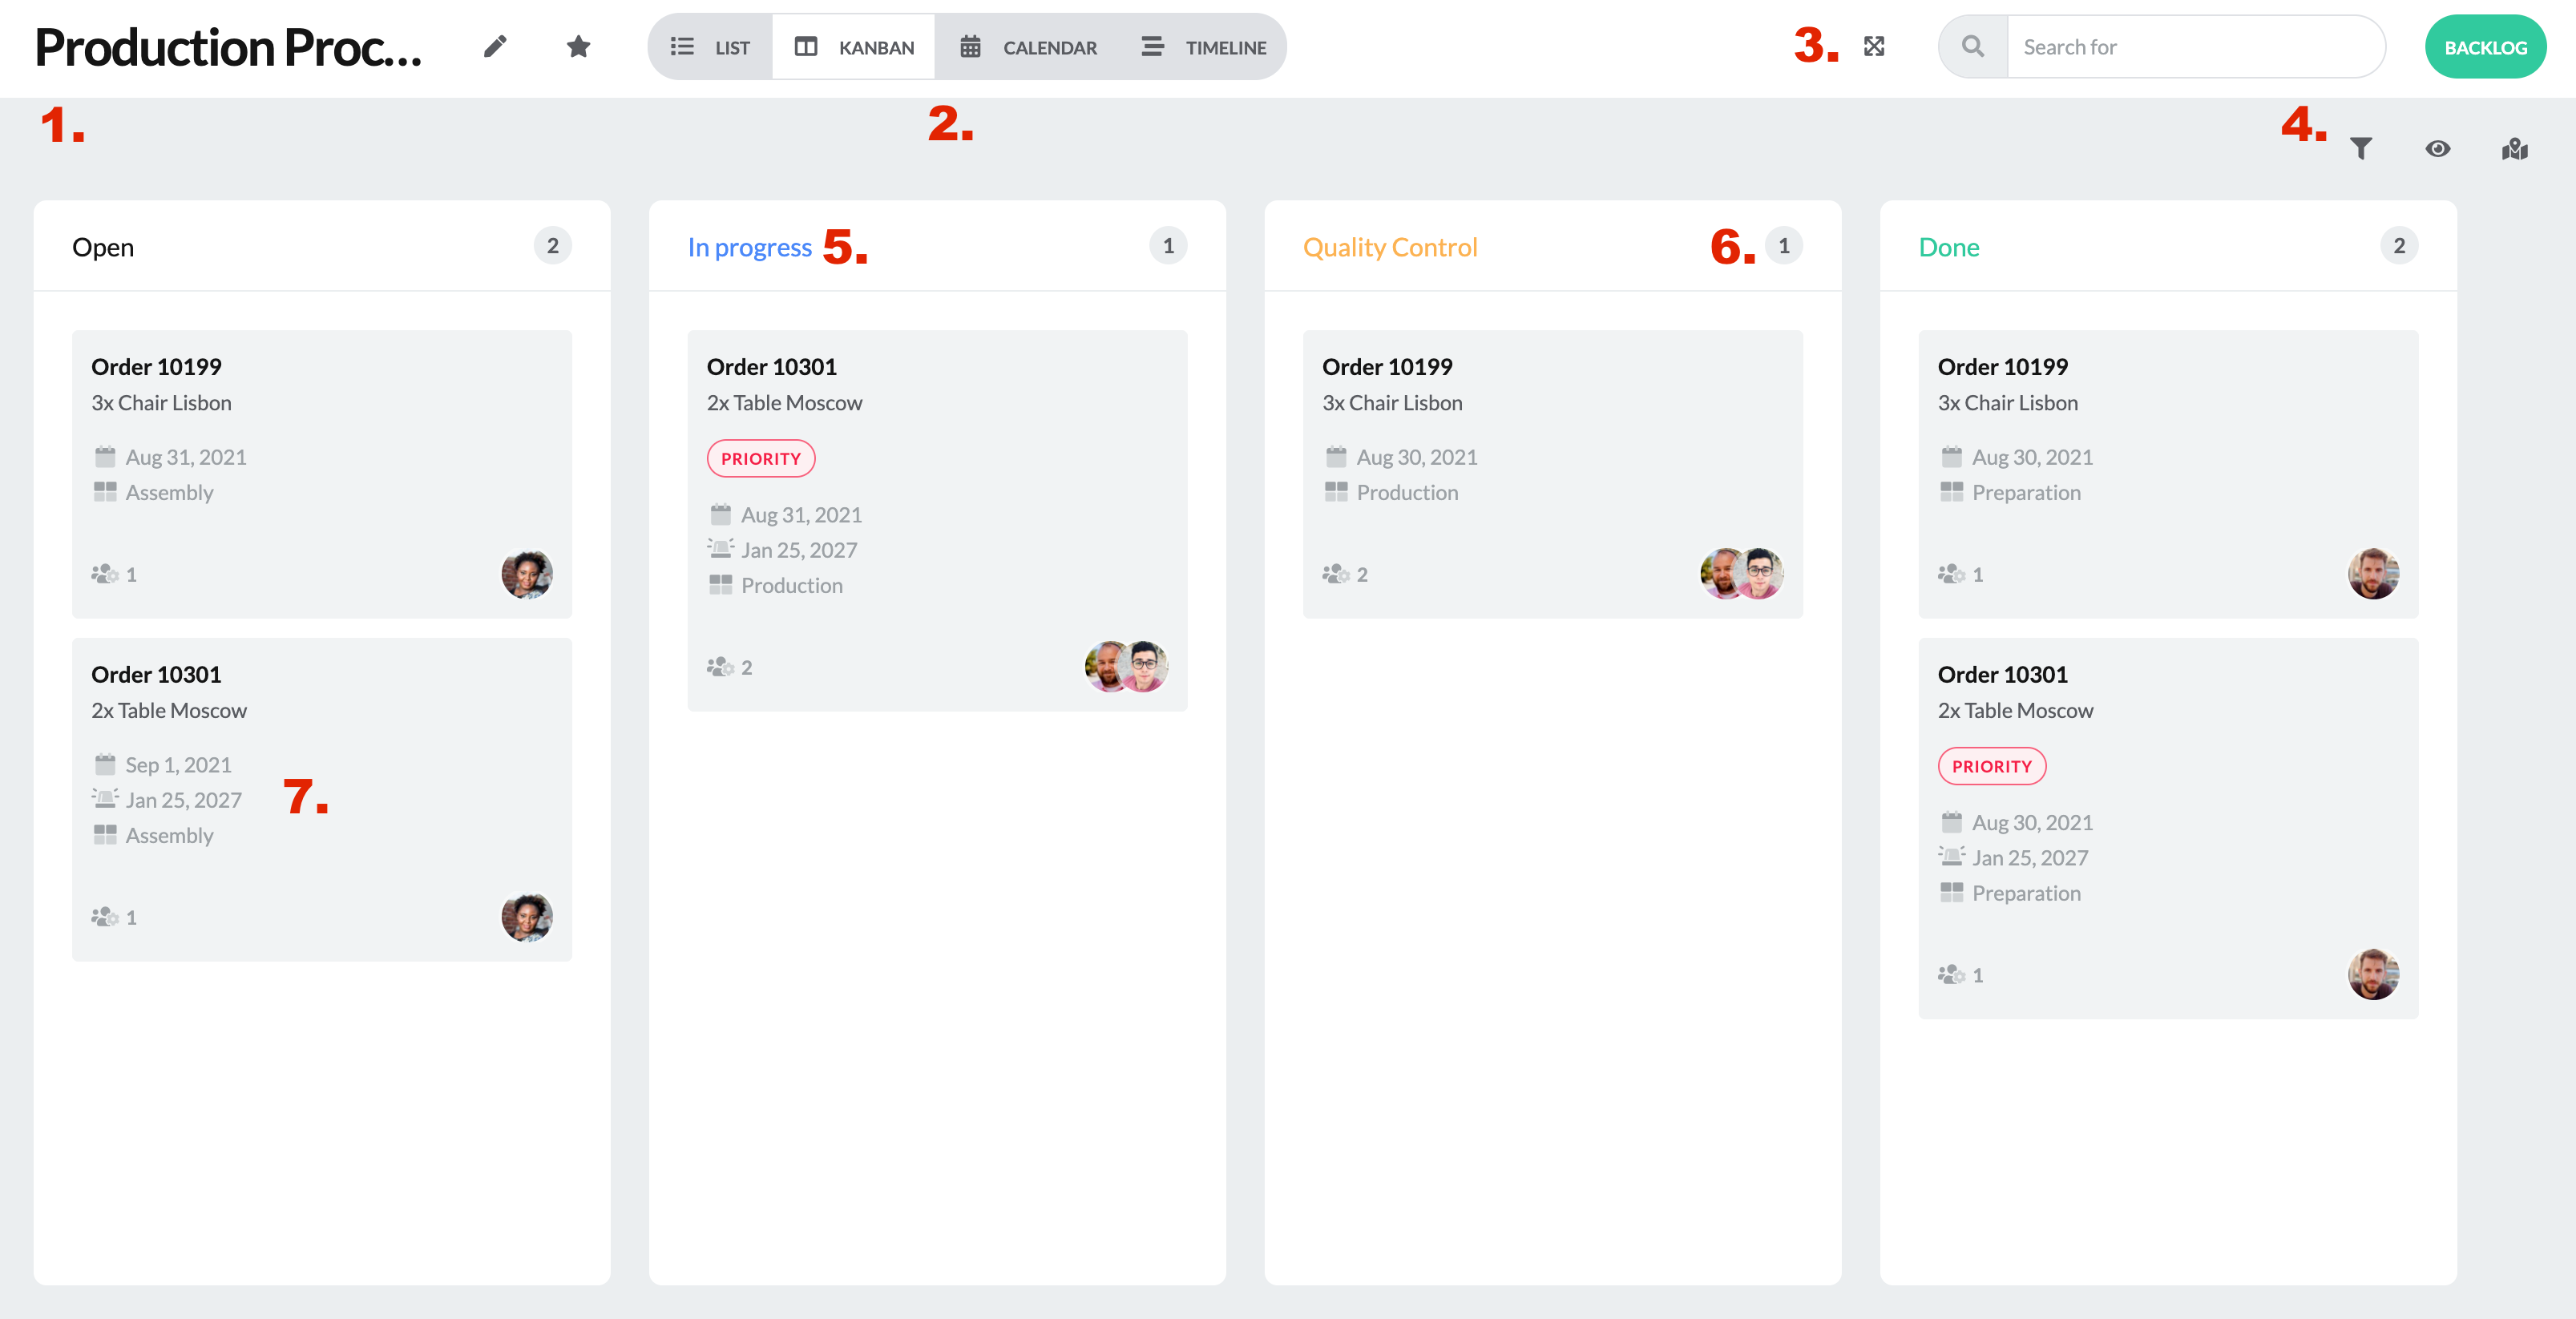
In Kanban planning, several buttons and functions are available. View the image above and read what the function means below.
1. The name of the board. Clicking on the pencil icon takes you directly to the settings of the planning board. Next to the name of the planning board is a star icon. This allows you to switch other plan views on or off.
2. The available plan views for your plan board. You can switch plan views on or off with the star icon.
3. You can use the cross icon to fully maximise your planning on your screen. Next to this icon is the search bar of your planning board. This allows you to search for work within your planning board. See also: Search function
4. The funnel icon is the filter of vPlan as it is available in other views of vPlan. You can read how filters work at: Filtering
The eye icon allows you to hide information on your planning board. This way you can make your cards as small as possible for maximum overview, or show extra information on your cards if you want more insight without having to click on them. More information can be found at Eye icon (show or hide information)
Next to the eye is a map icon. This allows you to open Google Maps and display addresses/locations entered in your cards. For this, you need an address field in your plan board configuration. More information can be found at Plan board: Additional fields
The backlog button opens the backlog. In the backlog, you can create cards that do not yet need to be scheduled.
5. Shelf columns are an important aspect of a Kanban planning board. The columns are based on statuses that you have set up in your plan board configuration. See also: Setting up Kanban
6. How many cards are planned for each board column is indicated. In this way, vPlan immediately visualises in which column the most work is open.
7. Cards. Your work is represented in vPlan by a card. A plan card displays e.g. a title, a description, the estimated duration, to whom the task is assigned and possible planning date. What you see on the front side of a planning map is determined by the eye icon (see point 4 in this legend). Clicking on the map will show even more information. See also: Editing of cards
3. Create and plan cards
You can create a card in the Kanban view in two ways, via the backlog or in the planning board itself.
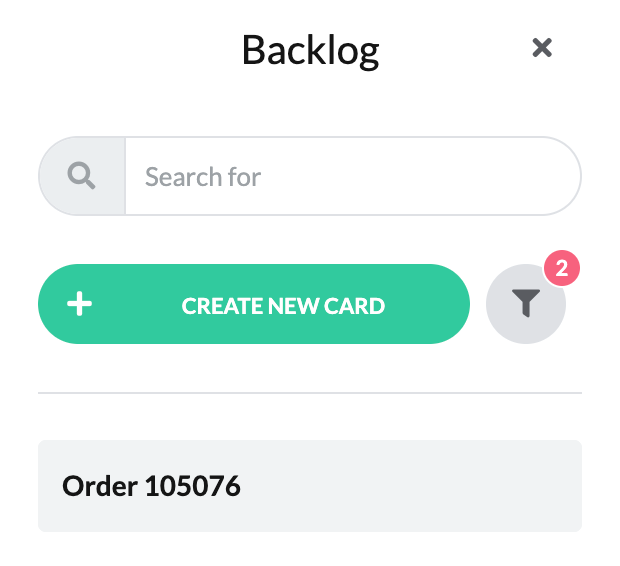
The backlog allows you to easily create a card. The backlog is a collection of cards that still need to be included in your plan board. Open the backlog by clicking on the green Backlog button at the top right of your plan board, and click on Create new card at the top.

Give your plan card a title, then press Enter. Your card is created and visible in the backlog. You can open the card by clicking on it and filling in further information. See also: Editing of cards
If you want to plan the card, you can do so by simply picking up the card with your mouse and dragging it to one of the status columns.
You can also create a new planning card on the board itself. If you move the mouse to the bottom of your status column, a field will appear in which you can create a new card.
Give the new card a title and press Enter.
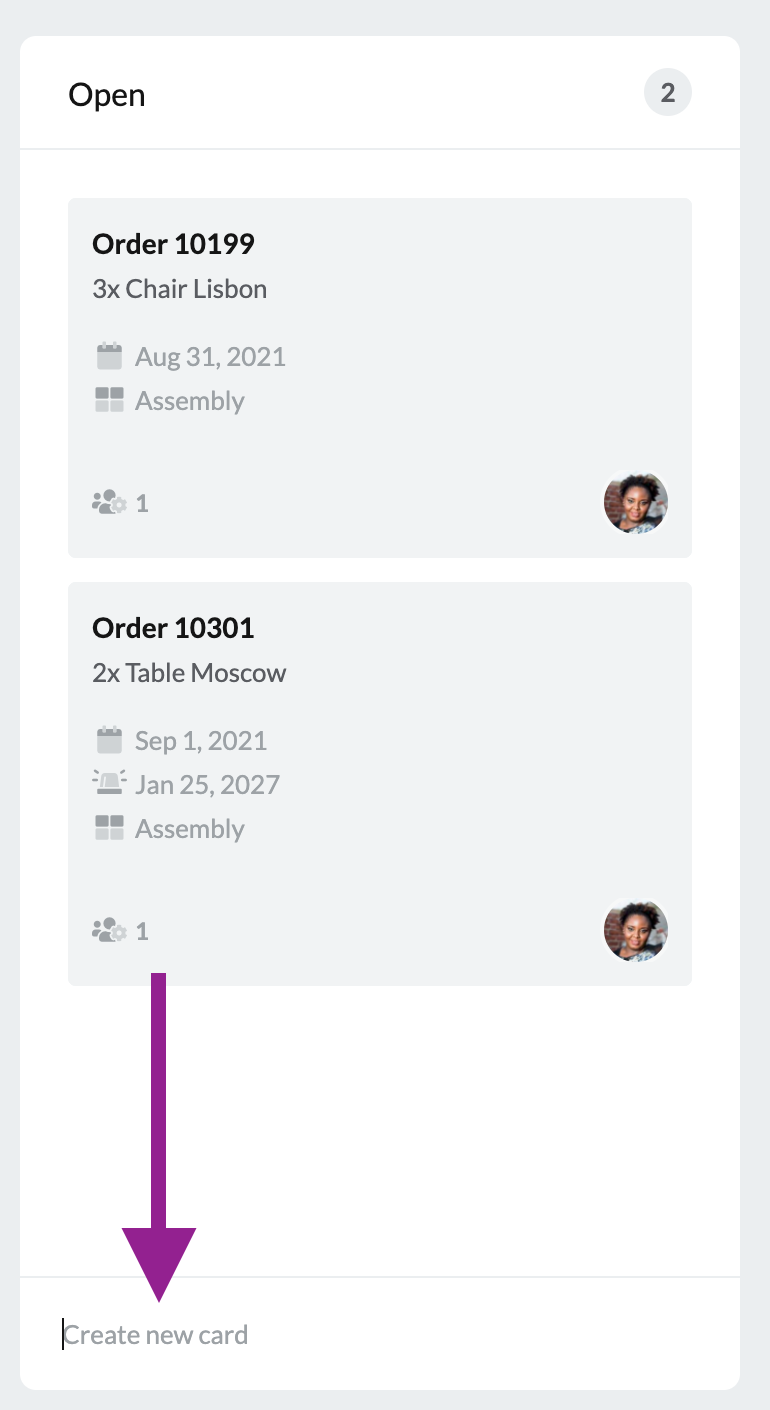
The card will now be created in the status column of your choice. You can then open the card by clicking on it and adding additional information.
4. Moving cards
In vPlan, cards are easy to move around. You do this by picking them up with the mouse and dragging them to another position. You can prioritise cards by dragging them to the top position in your status column, or by dragging them to another status.
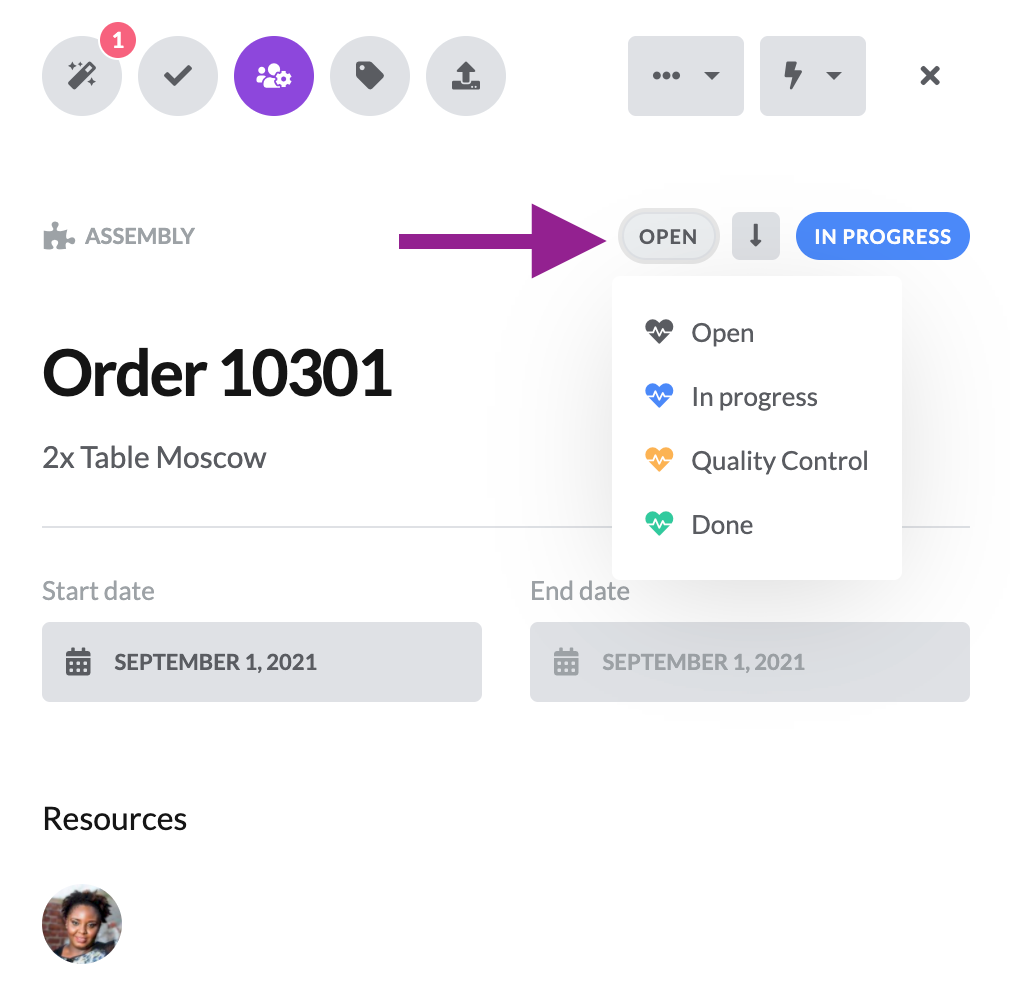
You can also open a card and change its status from the opened card:
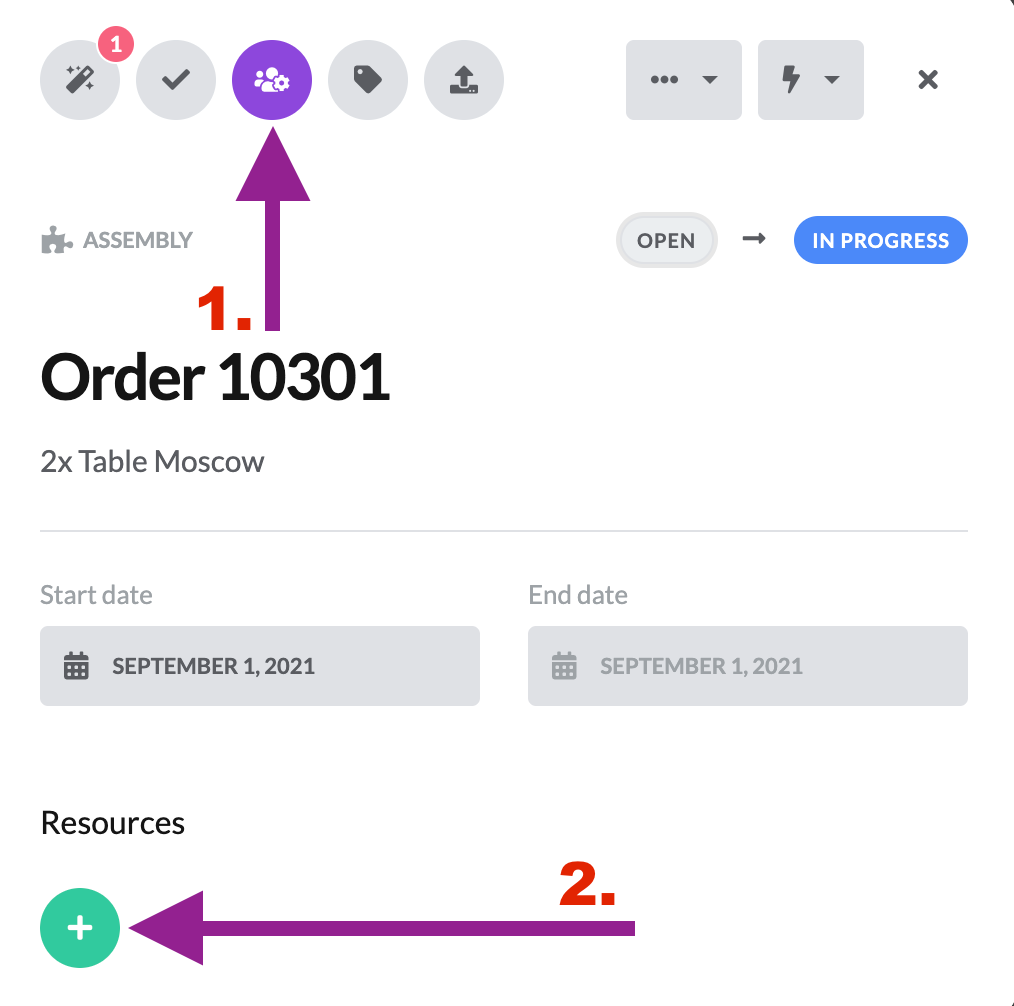
5. Assigning cards
Assigning tasks to colleagues or machines? You can do this by opening the card in your board. At the top of the card, make sure that the assignment of resources is switched on (see 1. in the image). Then click on the plus icon (see 2. in the image) under the heading Resources in the card to search in the list of available resources and to link the desired resource:
6. Preferences and filters
As a vPlan user you decide what you want to see in your board. To do this you use filters (funnel icon) and preferences (eye icon). This way you can easily hide all completed cards, or highlight all cards with a certain label. You can change the information on a card with the eye icon, for example by hiding the plan dates or labels.
More information on the filter can be found at Filtering
More information about preferences on your card can be found at Eye icon (show or hide information)
7. Using Kanban in combination with planning by date
Kanban is basically a planning method without dates. When you create a planning card in your kanban board, it will be created without a due date and start and end date.
However, you can plan by date, thus combining the Kanban method with the calendar view and/or timeline view of vPlan. To do this, simply open a card in your Kanban board and enter a start and/or end date. The date will appear directly on the card, but the card will also be visible on the corresponding dates in the other plan views of vPlan.
8. Using Kanban in combination with stage planning
Stage planning is a planning method in which you divide your work into several cards that belong together, but each can be planned separately. More information on the difference between stage planning and status planning can be found at: How can I move a card from stage to stage? The difference between stages and statusses.
When you use stage planning, you can also combine it with Kanban. If your plan board is divided into three stages, for example, and you plan a plan card that is distributed over these three stages, then the three cards will also be shown separately in the Kanban view.
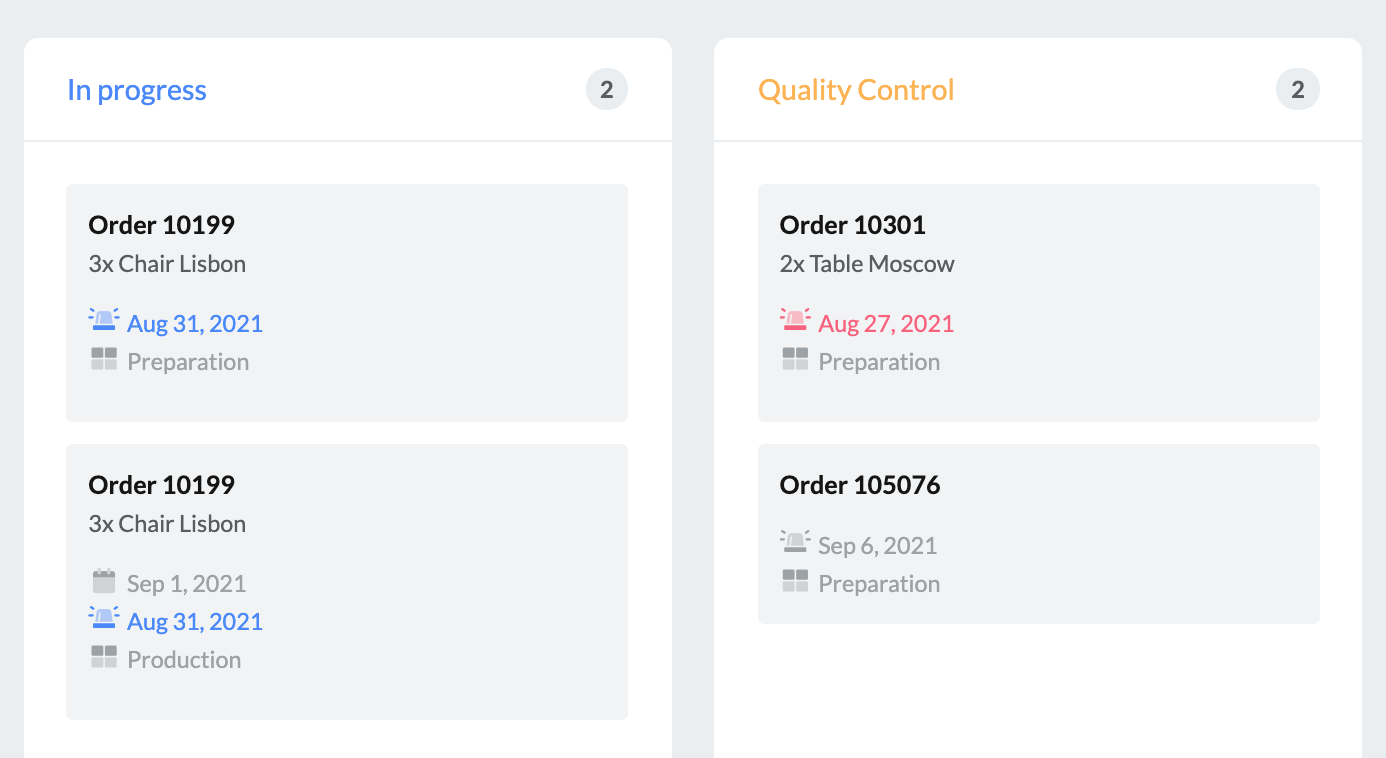
9. Using a due date in Kanban
The due date in vPlan counts as a deadline. You can easily apply this in vPlan by opening the card and setting a due date. This is not a planned date, so based on a due date alone, vPlan will not show the card in, for example, the calendar view or the timeline.
However, vPlan actively signals when the due date has been exceeded, or when the due date is today. The date will then be coloured red (expired date exceeded) or blue (expiring date today).